Connect the organization's Stripe account
Link the organization to Stripe so you can collect contributions by direct debit. You fill in Stripe's form only once, and the account is shared by all the organization's Cascades.
Before you start
- The organization's billing information must be filled in. See Edit the Cascade settings (legal identity, IBAN, VAT, address, logo, prefix).
- Have what you need to answer Stripe's questions: information about the organization, the representative's ID document, beneficial owners and the IBAN of the account that will receive the money.
- Only one Stripe account is used for the organization. If it has several Cascades, they share it.
Steps
1. Open the Stripe account block
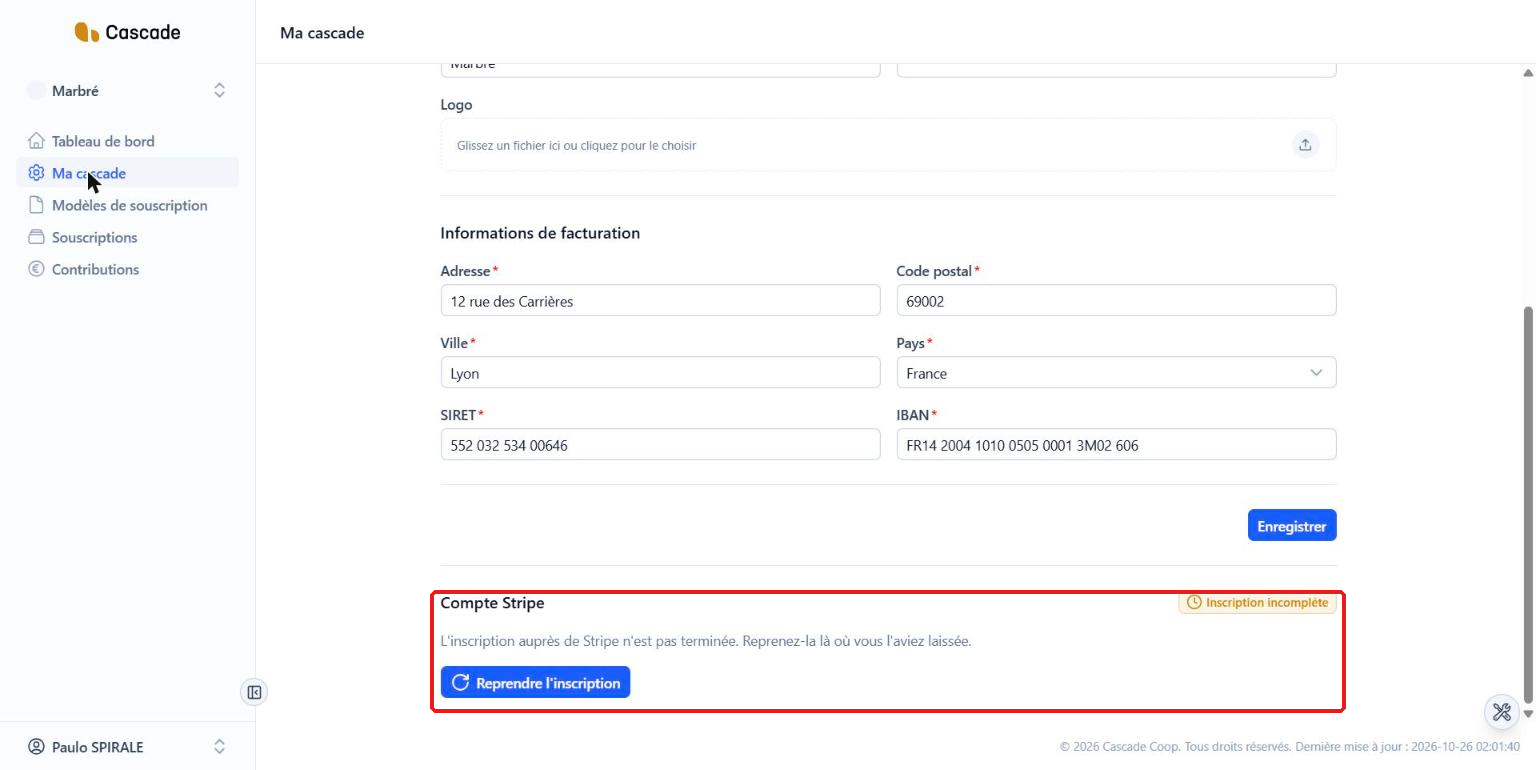
In the menu, go to Ma cascade (My Cascade), then scroll all the way down the page to the Compte Stripe (Stripe account) block. Click the button to start registration (Reprendre l'inscription (Resume registration) if you had already started it). You leave Cascade for Stripe's website.
2. Create your Stripe access
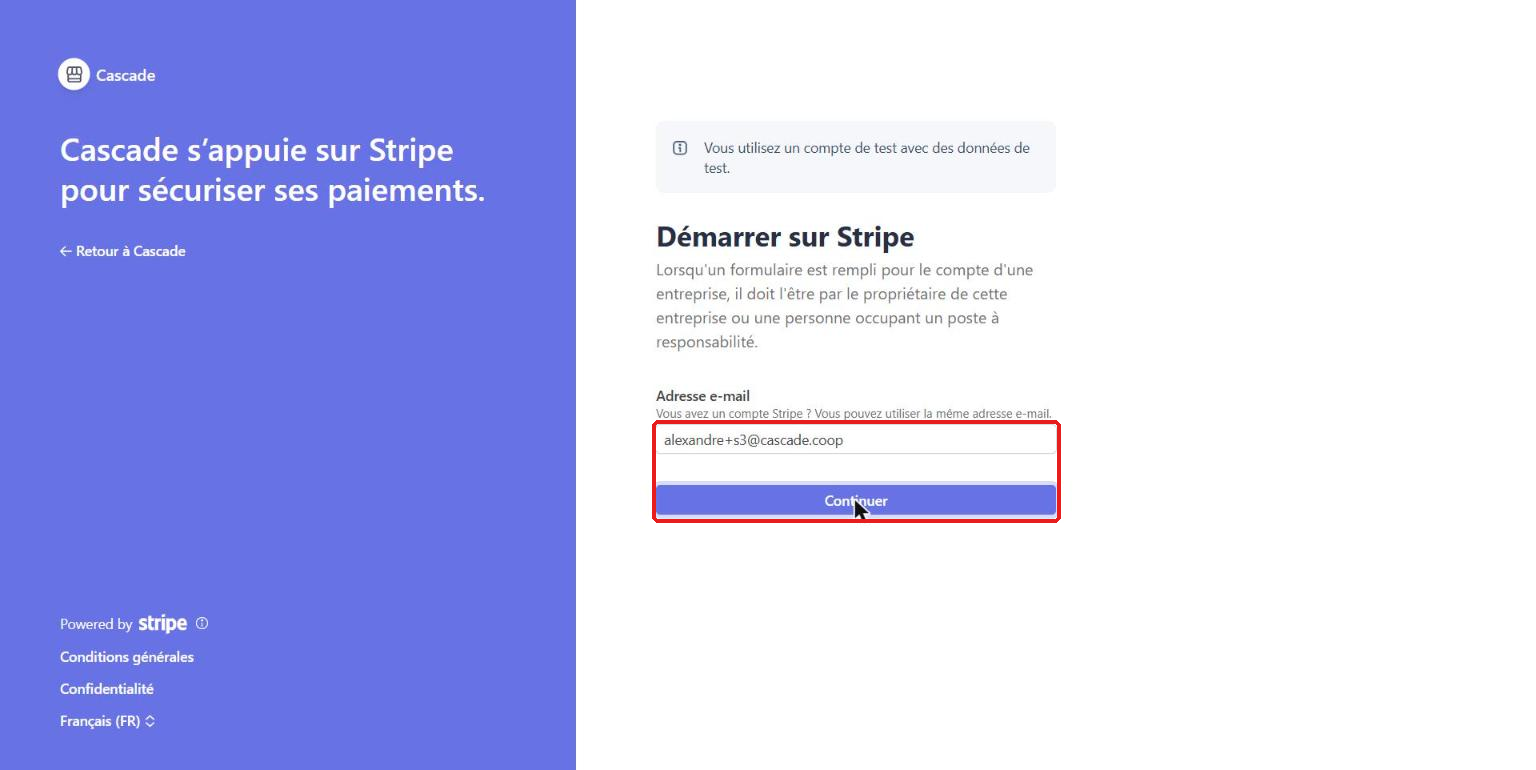
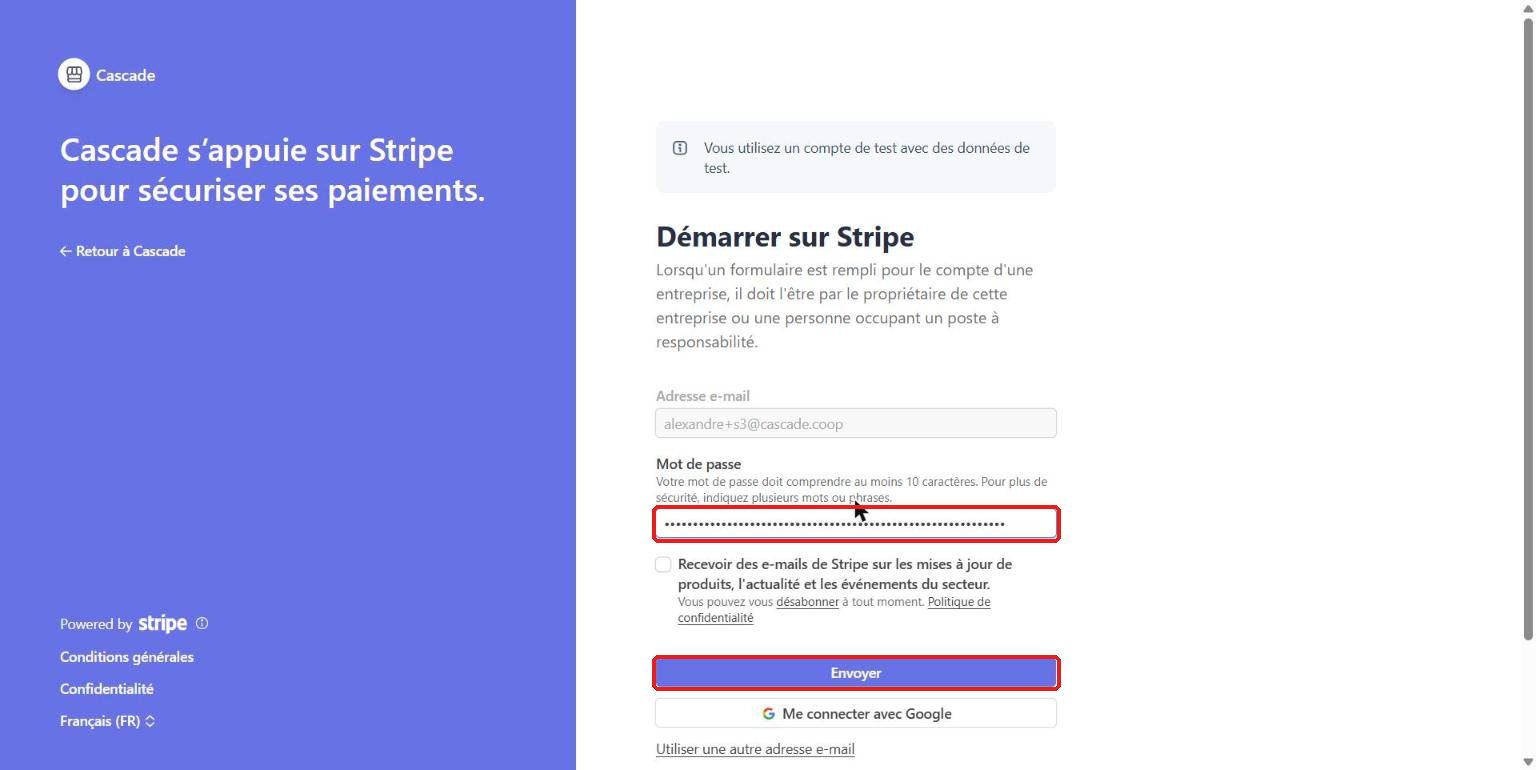
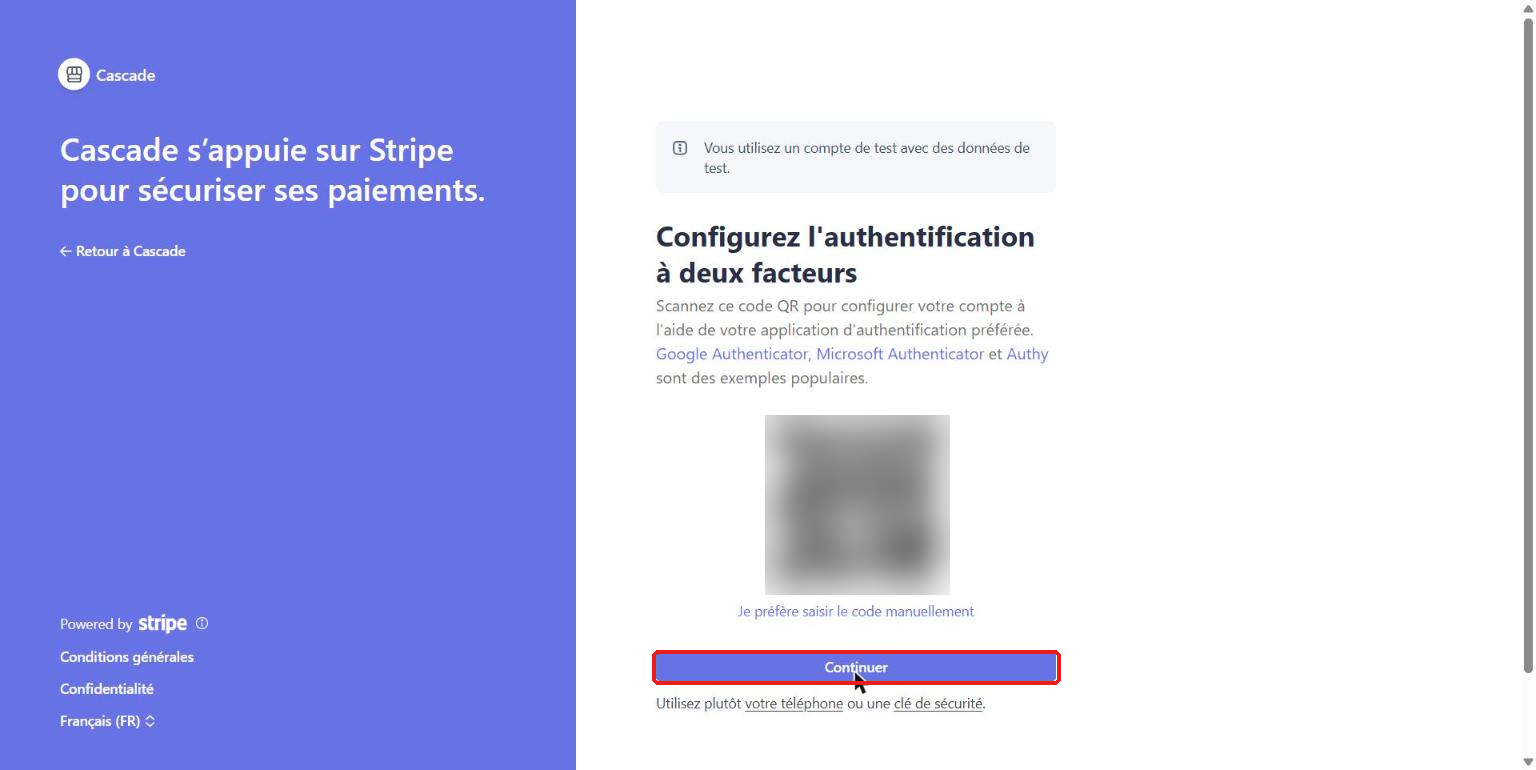
Enter your email address, then choose a password. Stripe then asks you to secure access with two-factor authentication: scan the QR code with an authenticator app, then enter the 6-digit code it shows. Stripe then shows you a recovery code: keep it safe.
3. Introduce your organization
Enter the country and the type of business (individual, company or association), then, for a company, its structure. Then fill in its name, its SIREN number, its address, its phone number, its business sector, its website and a short description of what you sell.
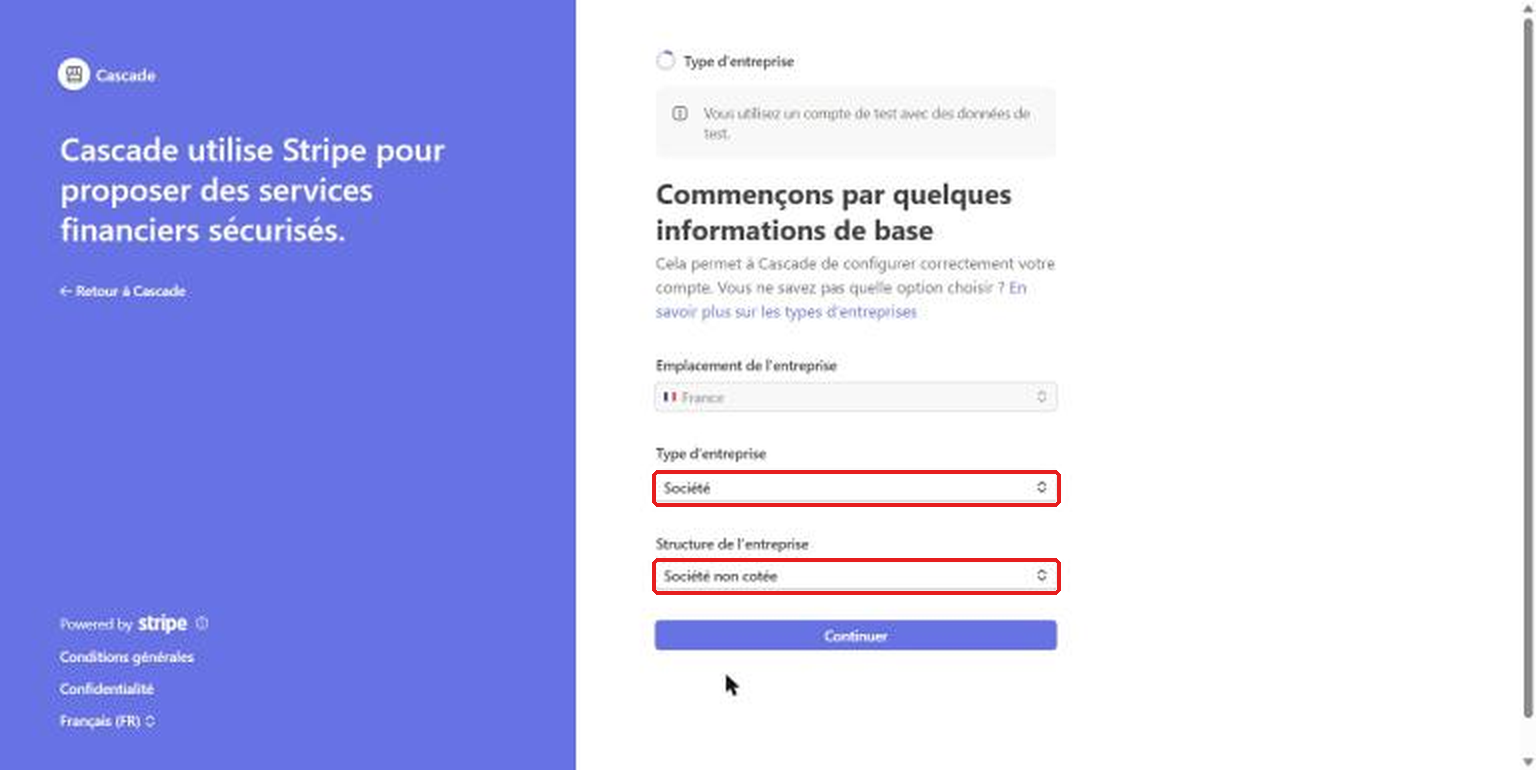
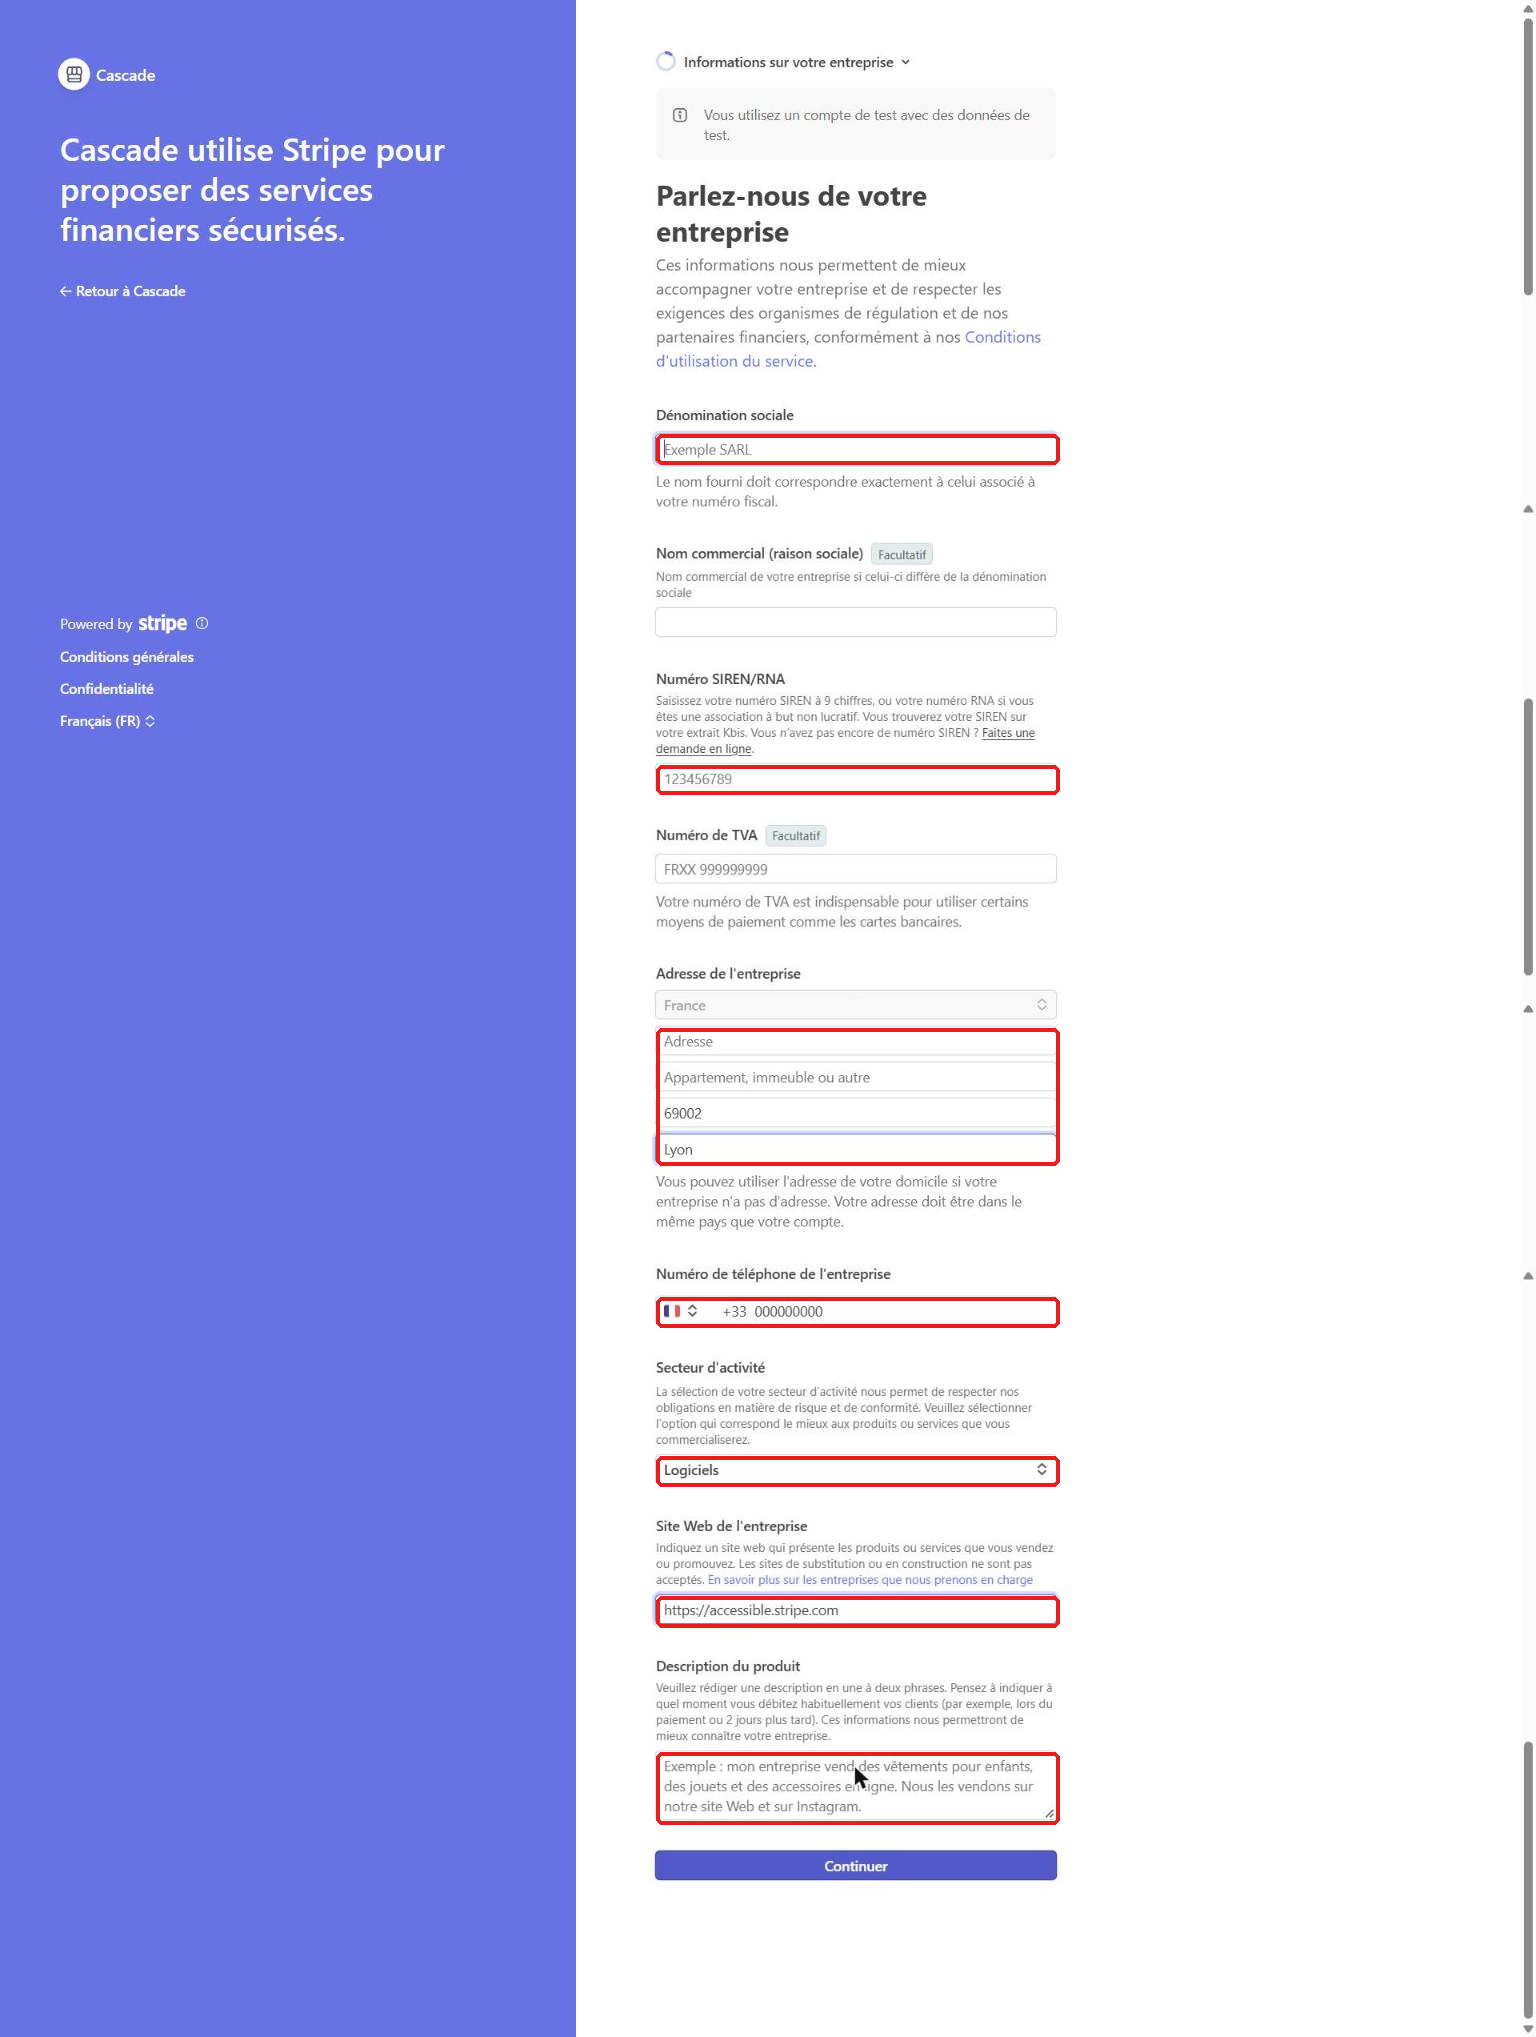
4. Identify the representative
Enter the name, email, job title, date of birth, address and phone number of the person who represents the organization. Stripe then asks them to prove their identity with an ID document.
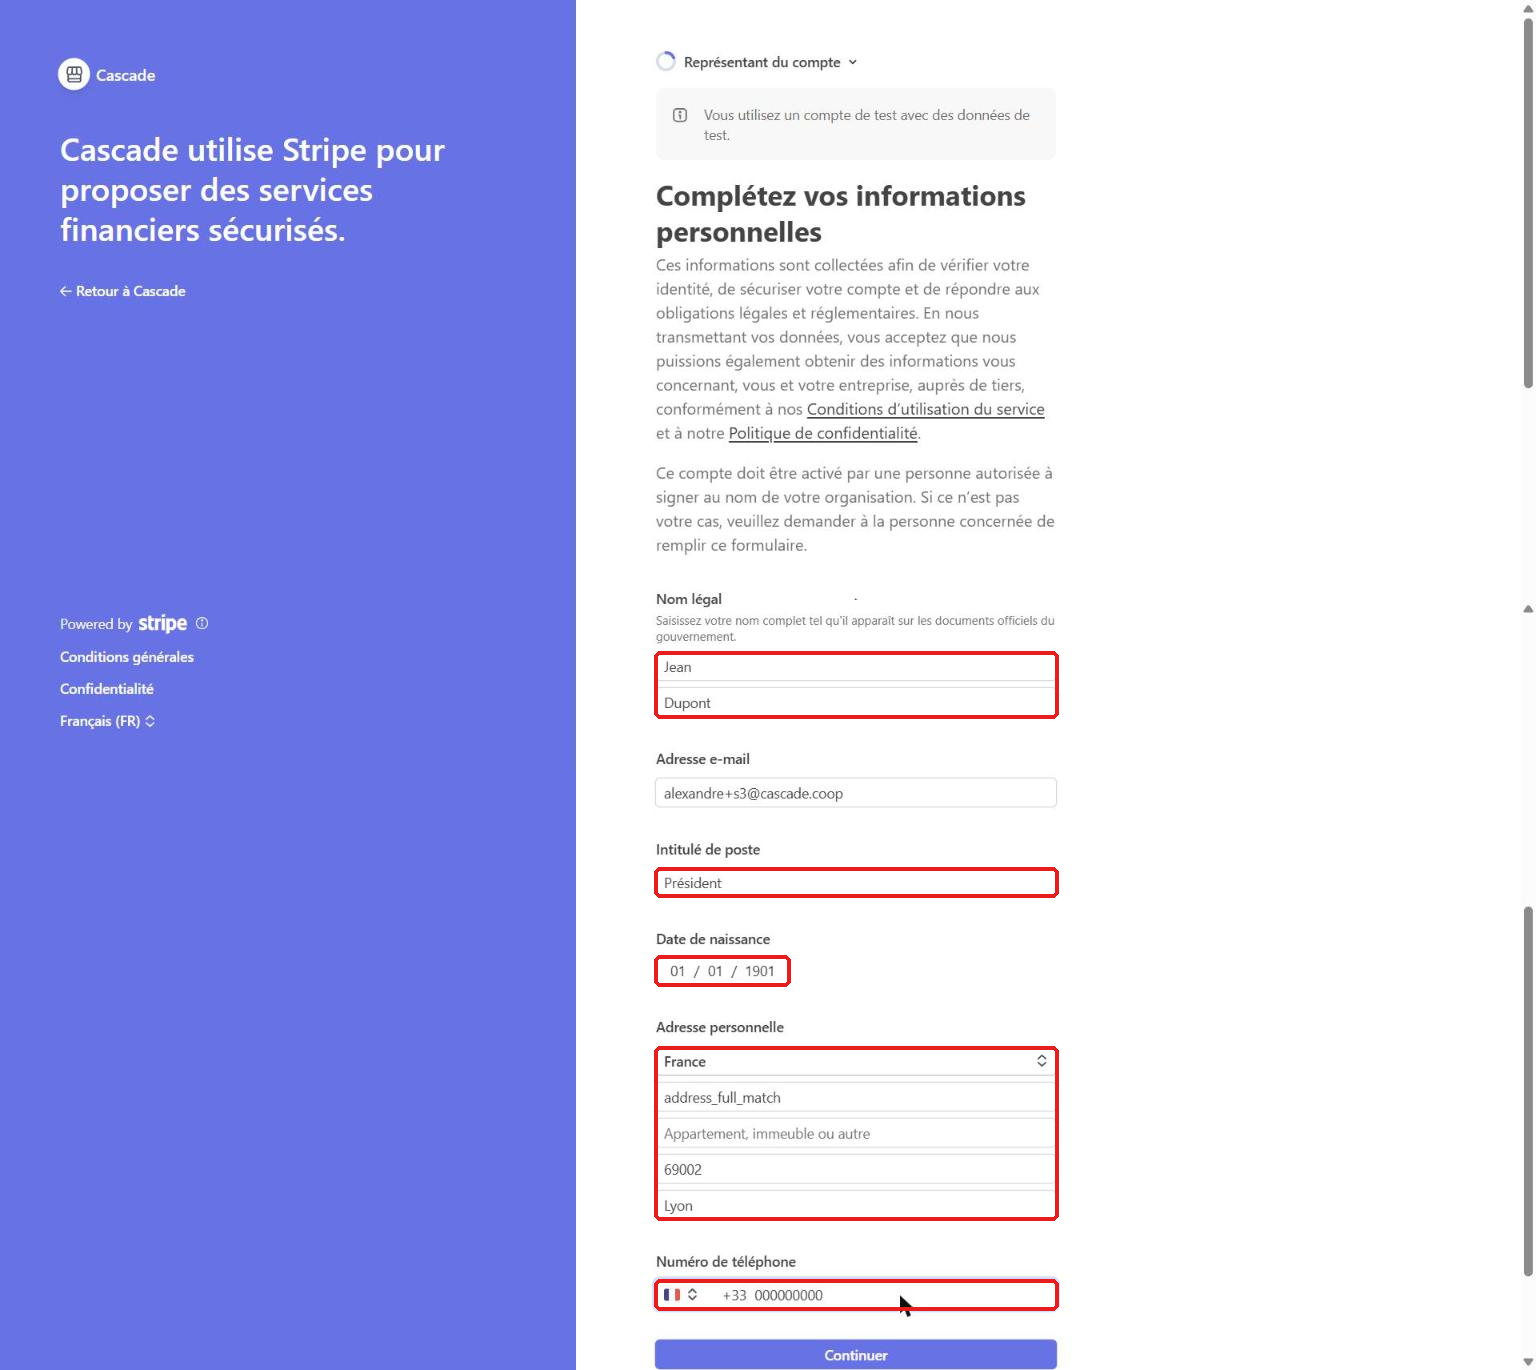
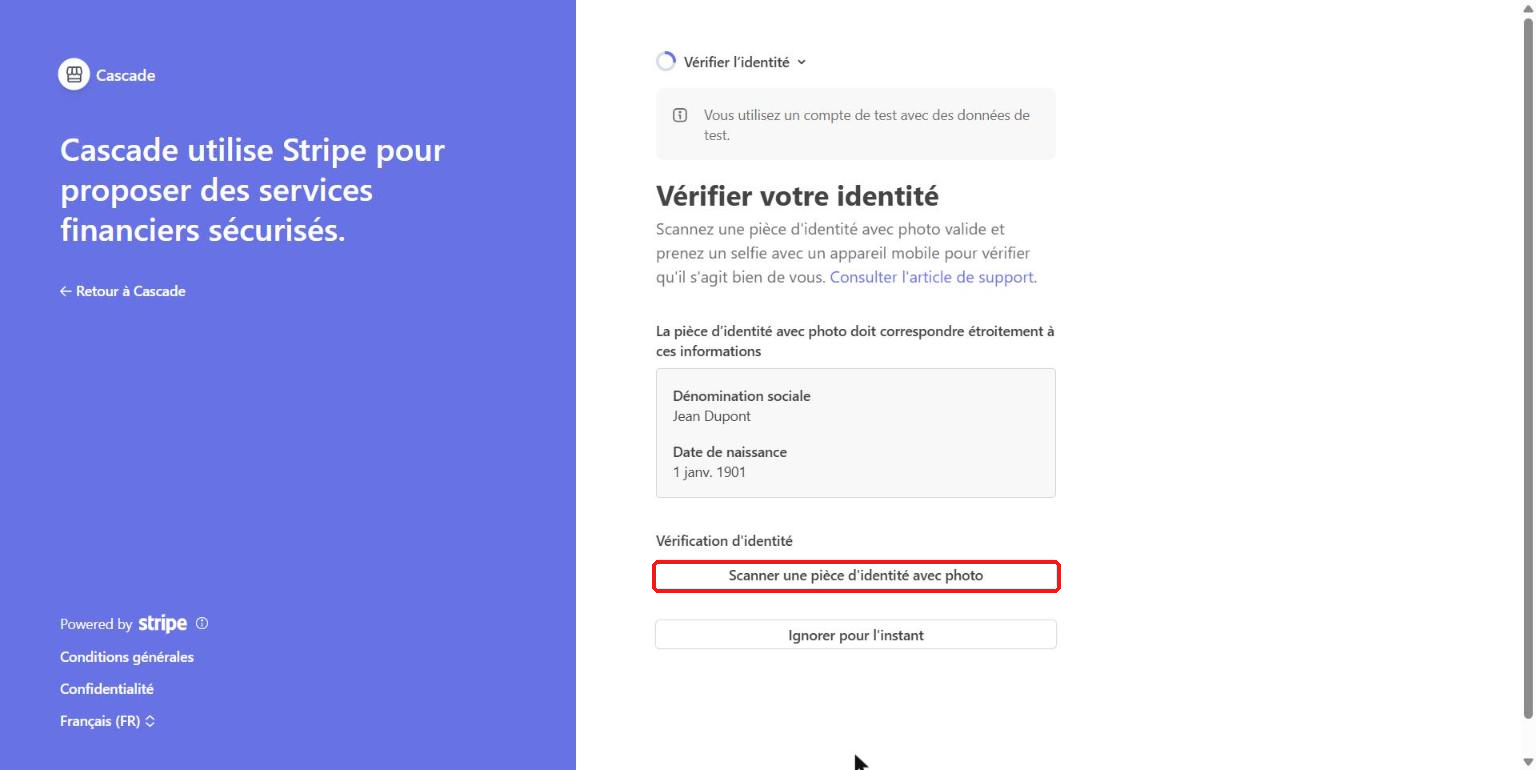
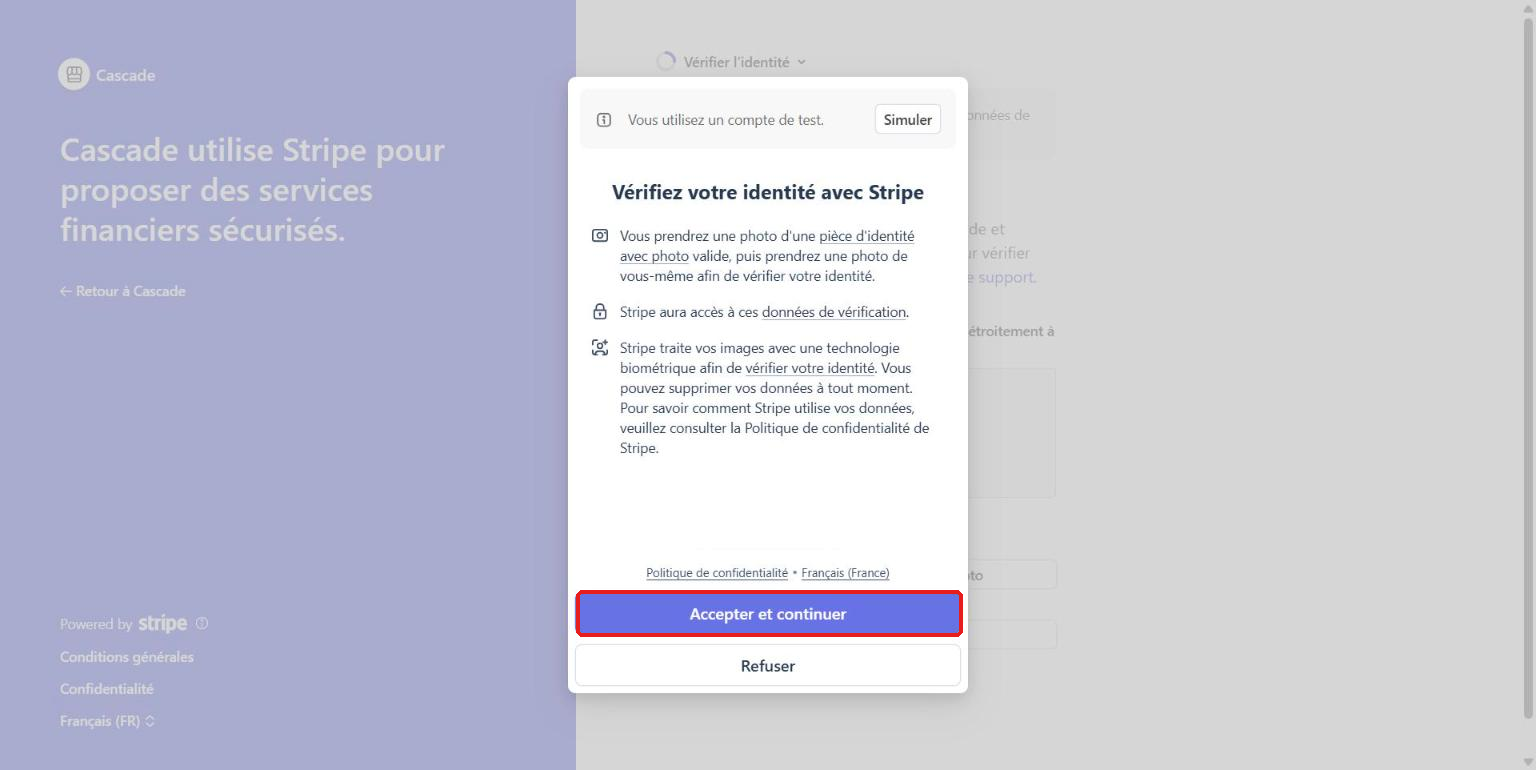
5. Confirm the beneficial owners
Stripe may suggest people. Check the list, then fill in the requested information for each one (email, date of birth, address).
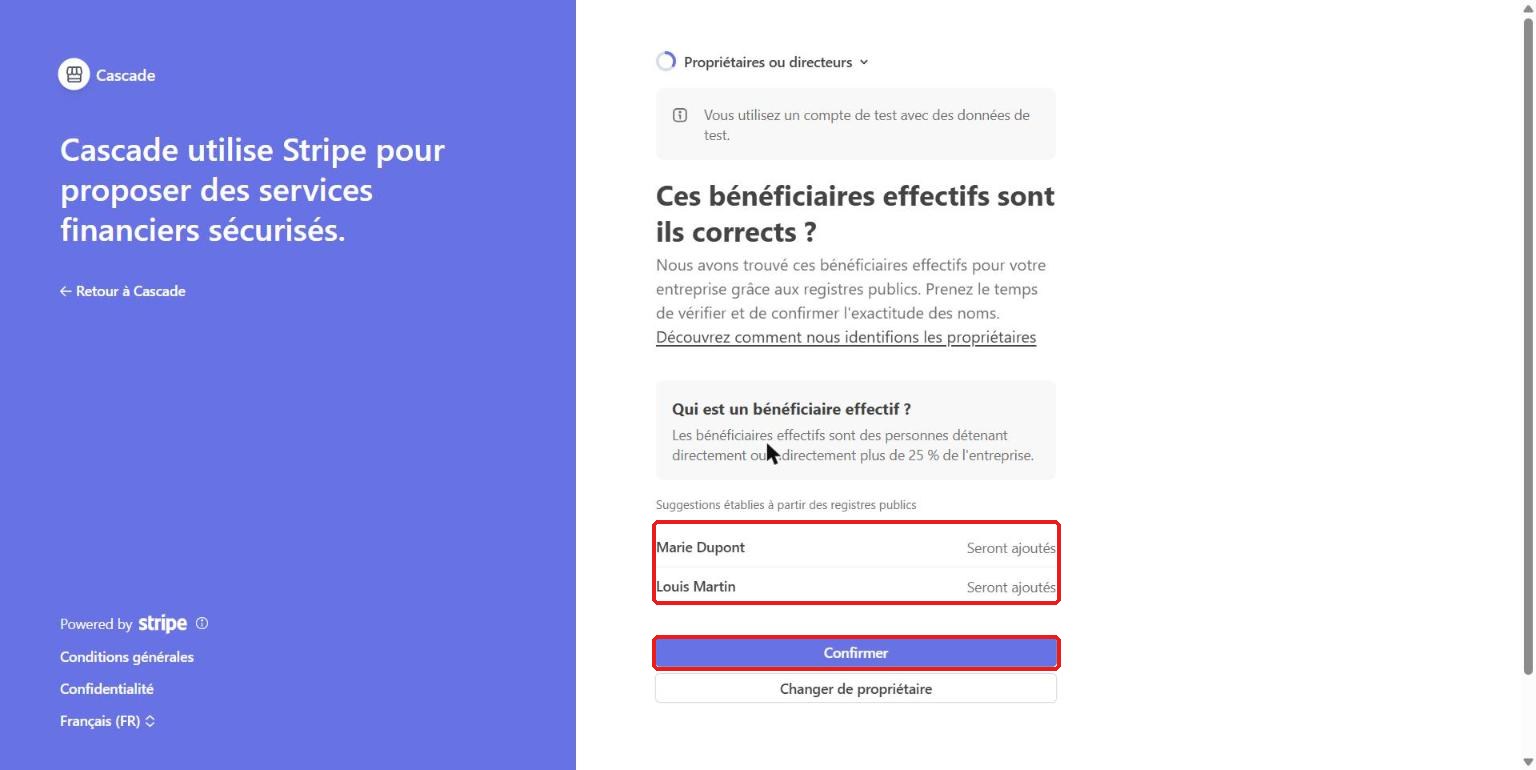
6. Add the bank account
Enter the IBAN of the account that will receive the payouts. Stripe also displays the terms of the SEPA direct debit mandate: read them before continuing.
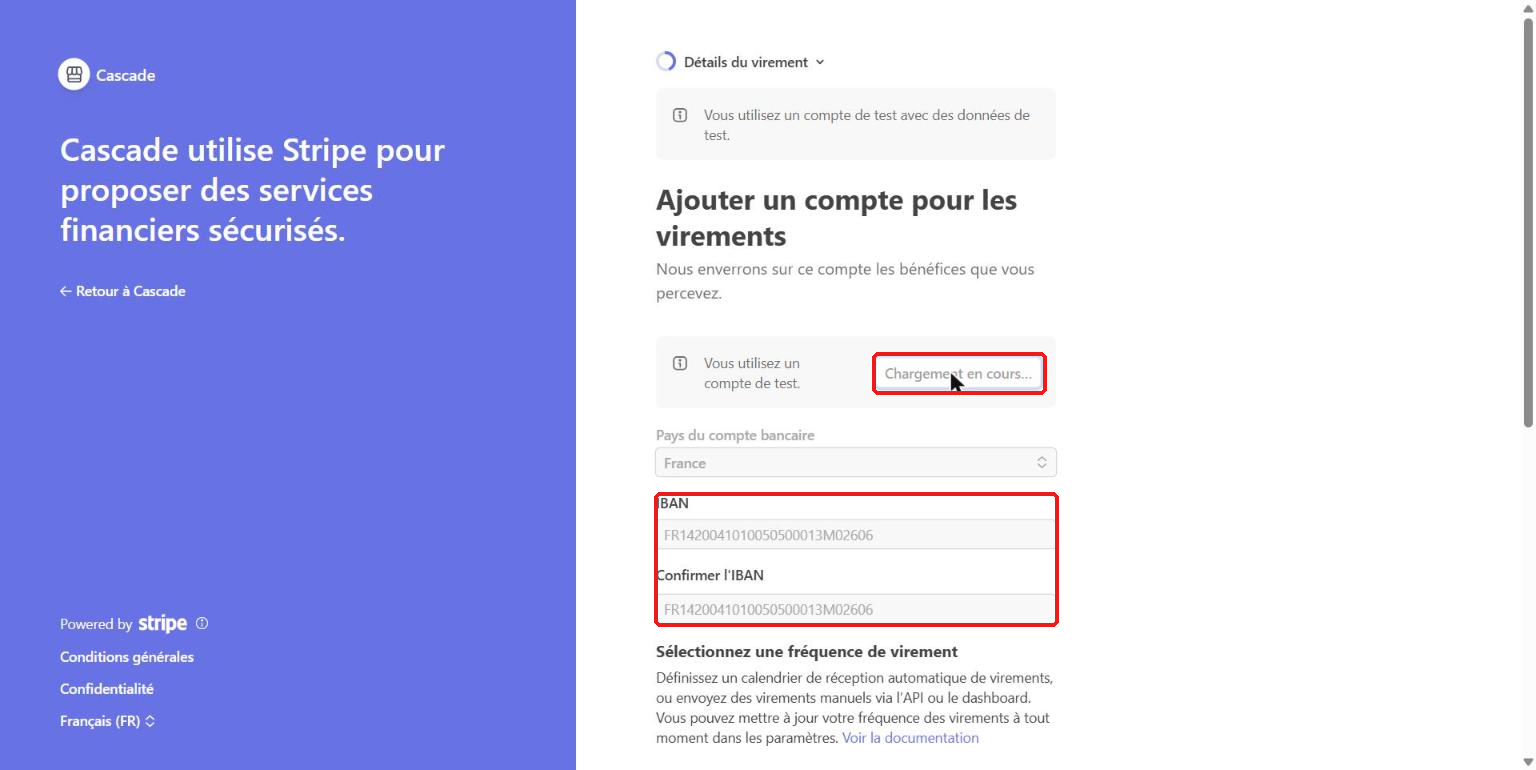
7. Complete the public information
Check the name and phone number that will appear to customers on their statements.
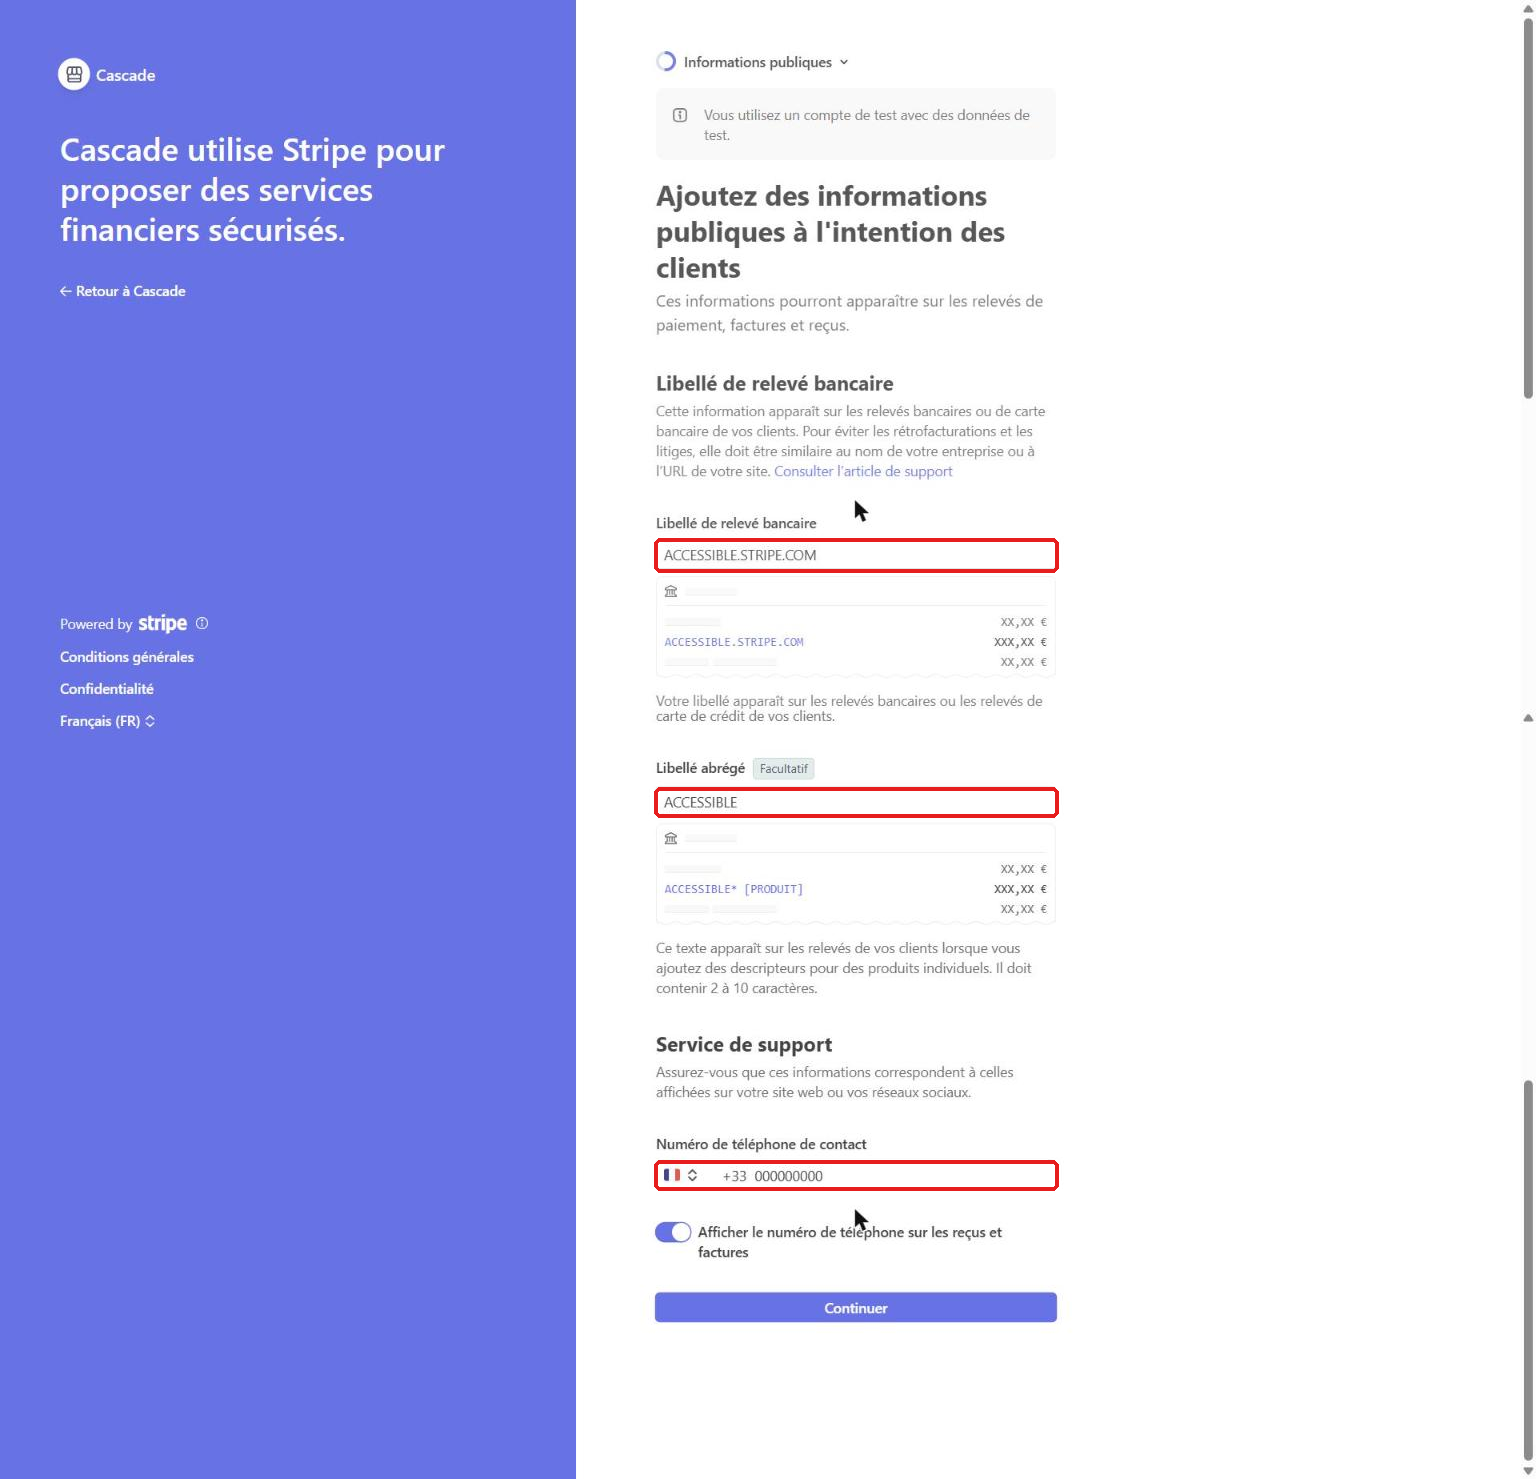
8. Choose the optional extras
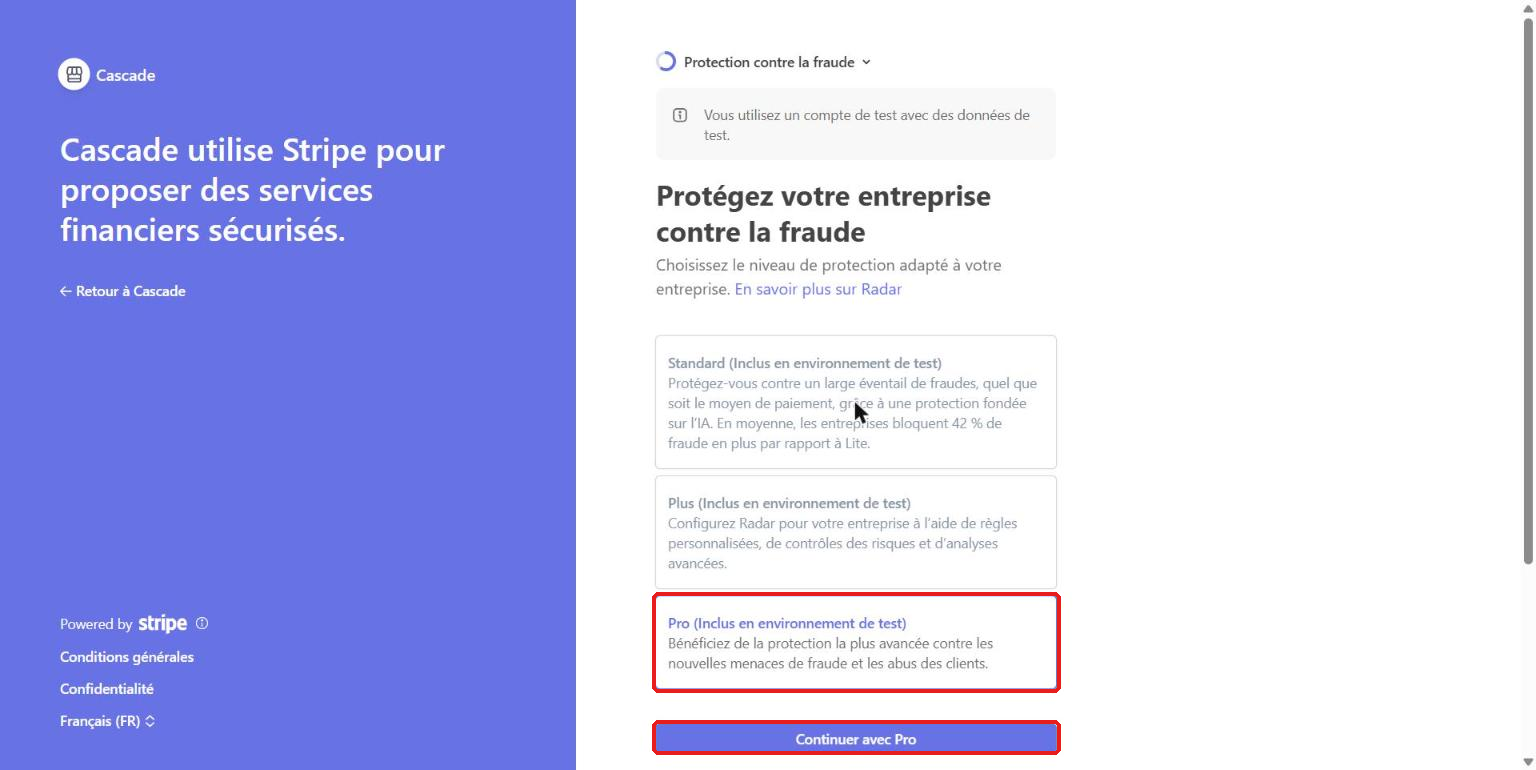
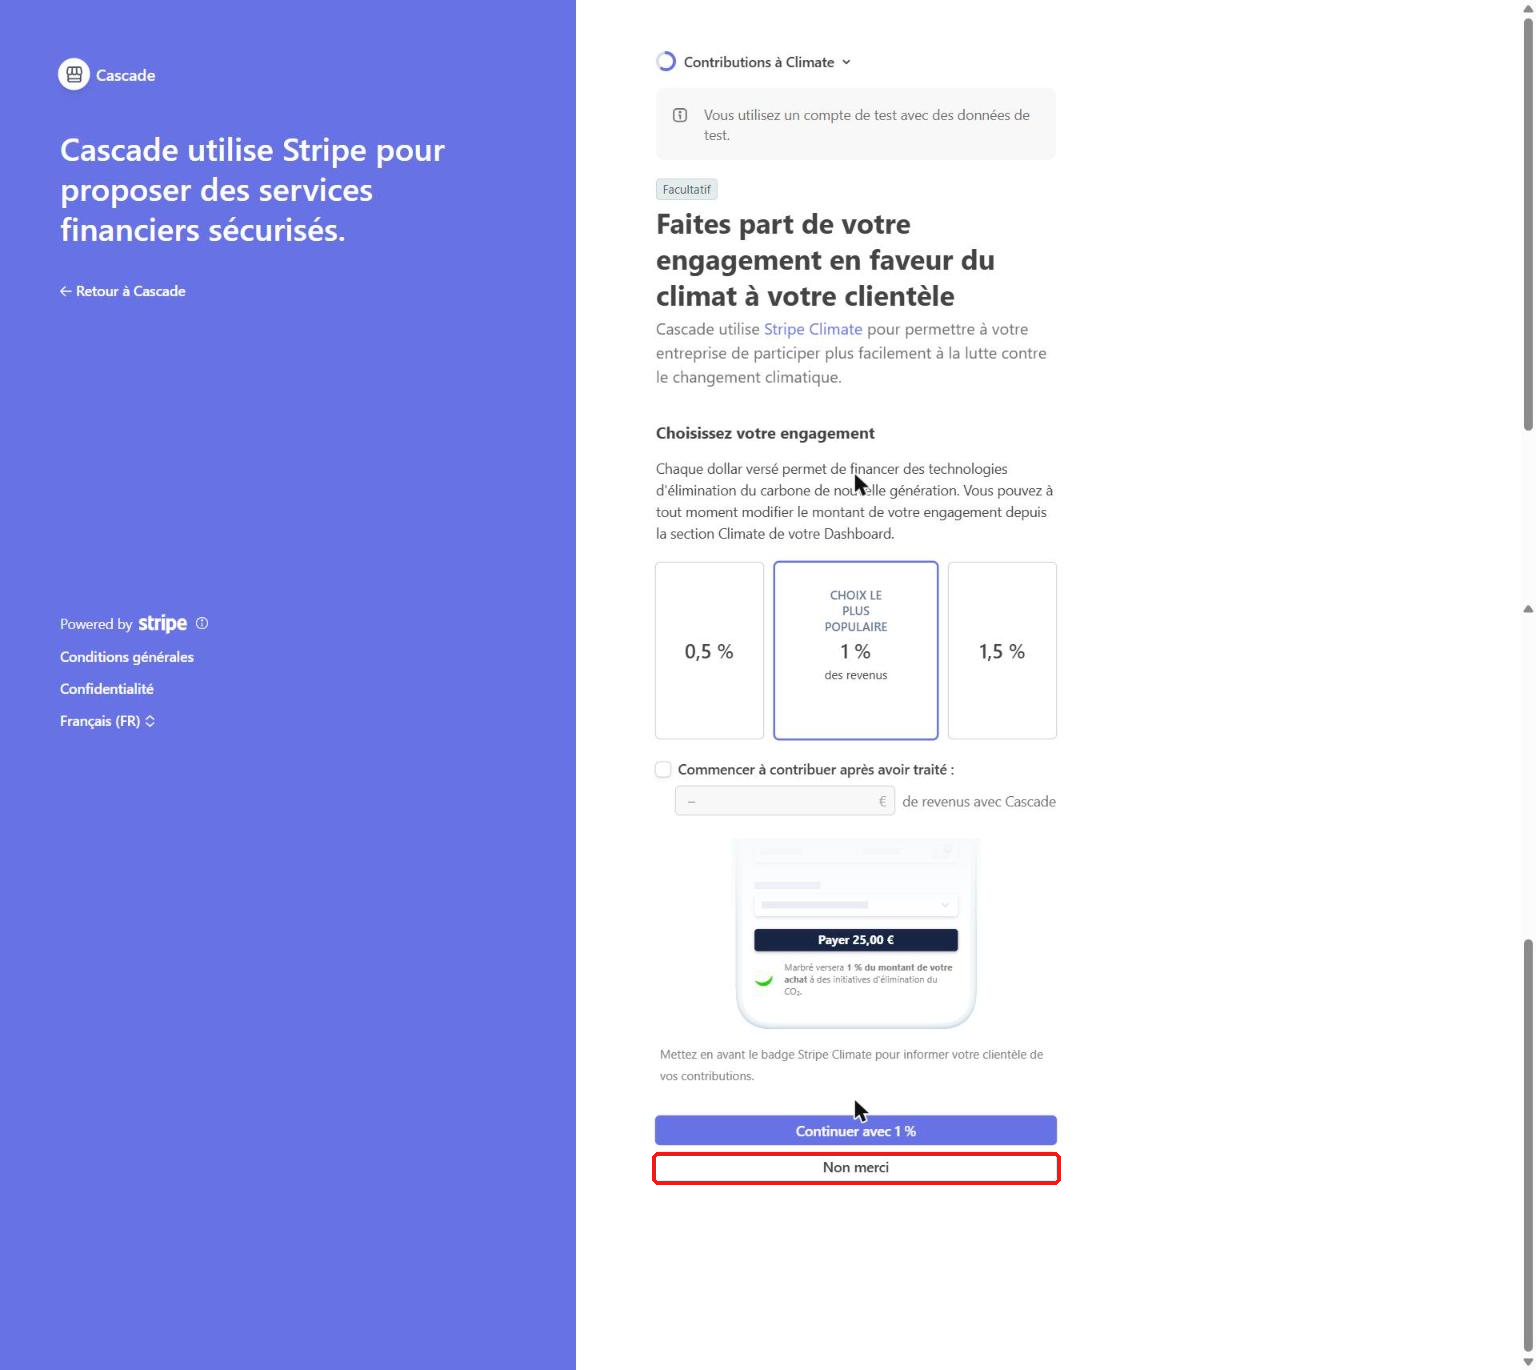
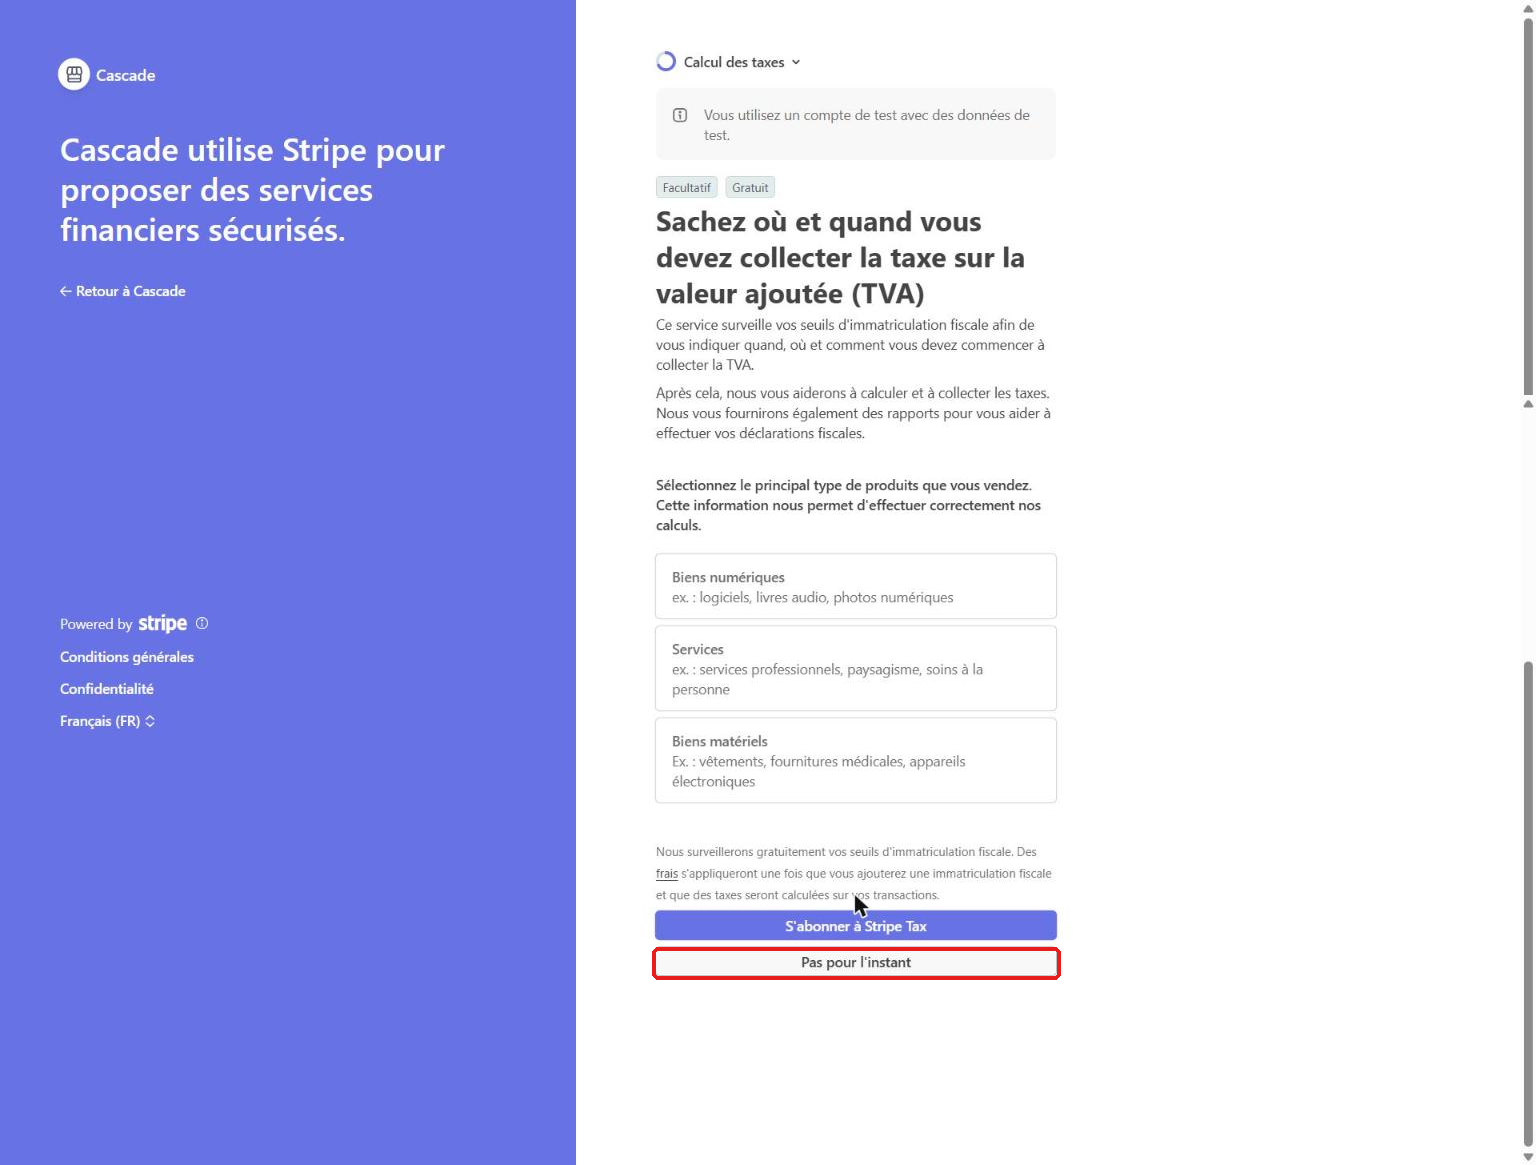
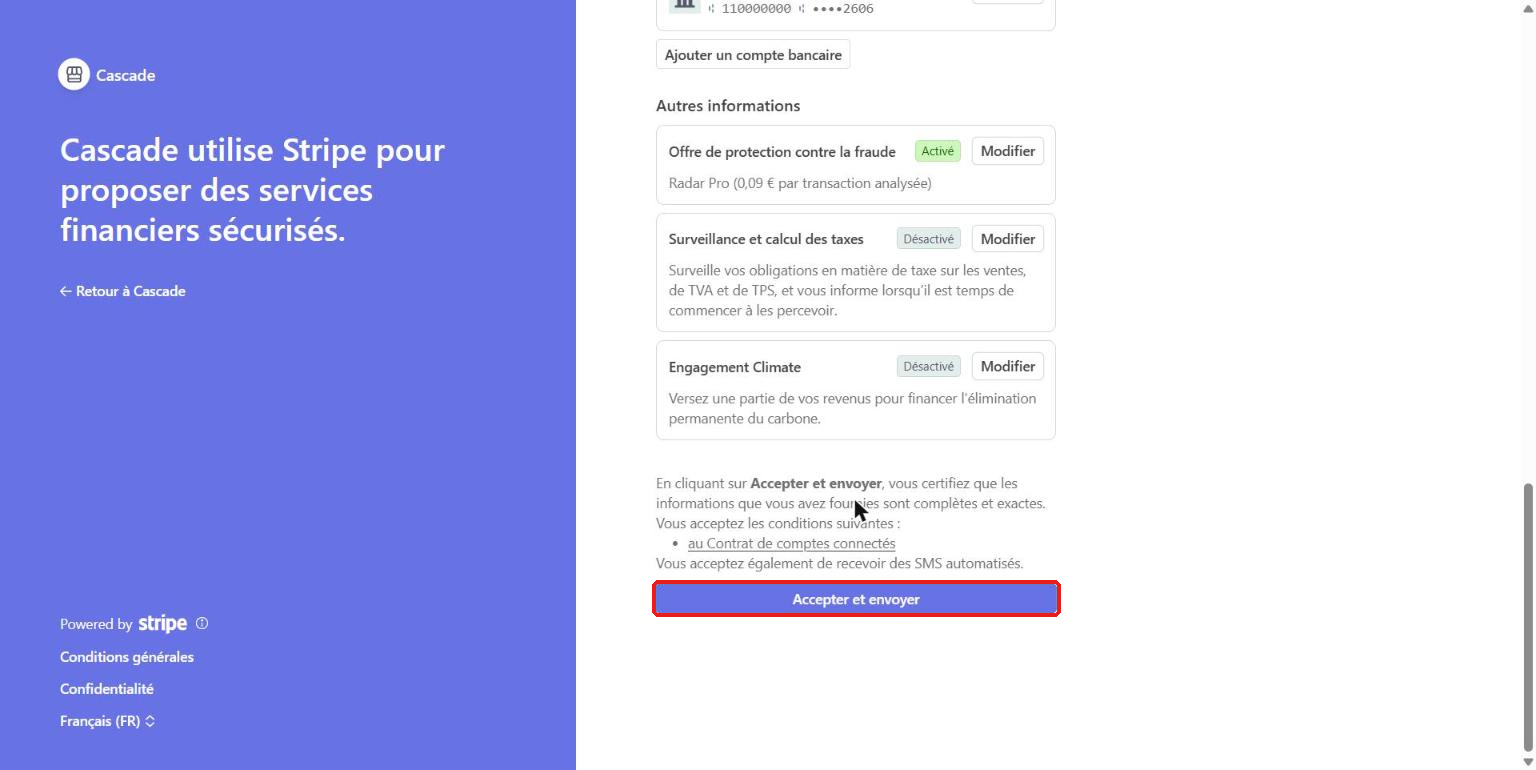
Stripe offers a level of fraud protection, a climate contribution and tax calculation. Cascade does not use tax calculation: choose Pas pour l'instant (Not for now). You can decline the climate contribution with Non merci (No thanks).
9. Review and submit
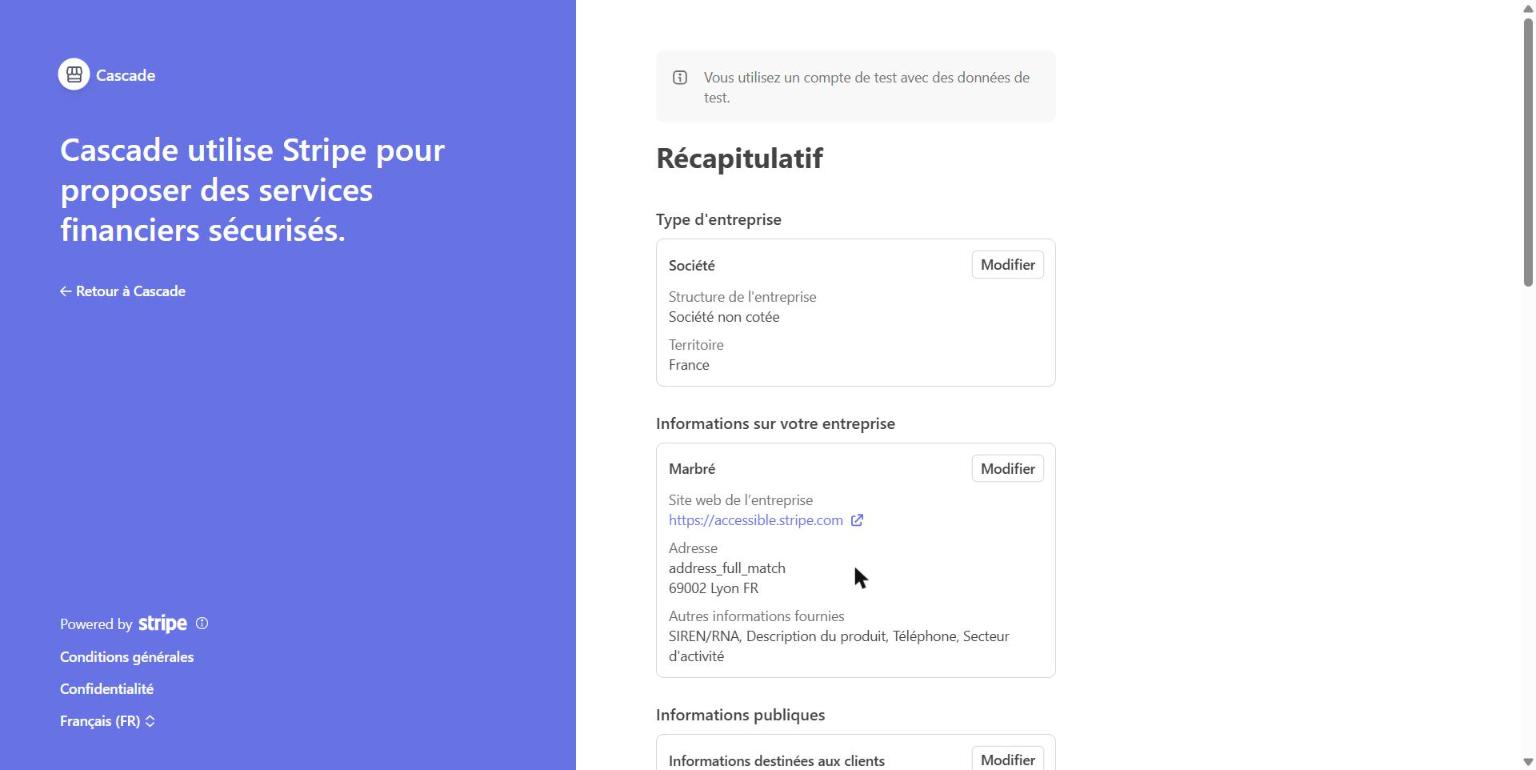
The summary gathers everything you entered: edit whatever needs changing, then click Accepter et envoyer (Accept and submit). By doing so you certify that the information is accurate, you accept Stripe's connected account agreement and you agree to receive automated text messages.
What happens next?
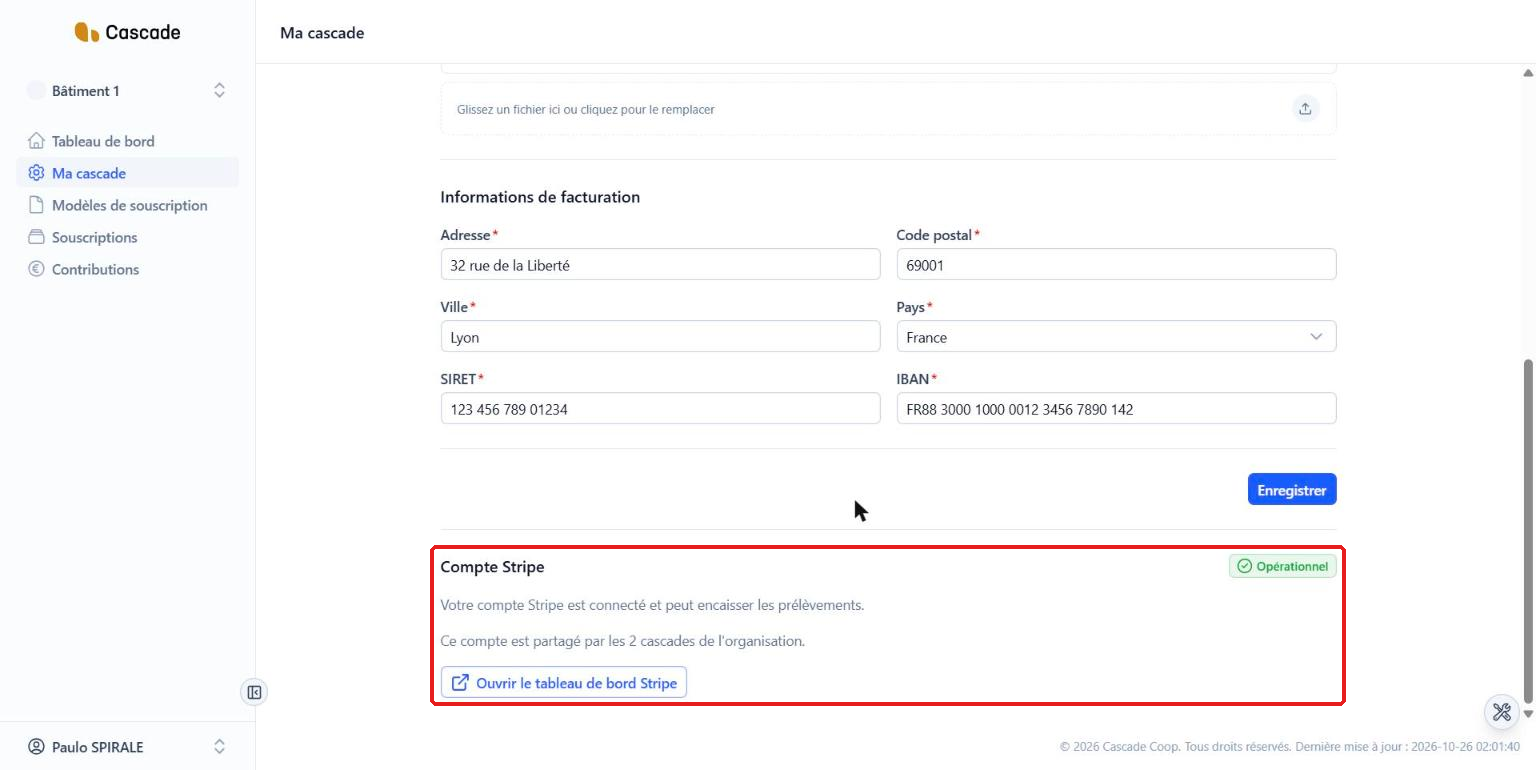
- You come back to Cascade, on My Cascade, with the message « Votre compte Stripe est connecté : vous pouvez encaisser par prélèvement. » (Your Stripe account is connected: you can collect by direct debit.).
- The Compte Stripe (Stripe account) block shows Opérationnel (Operational), states that the account is shared by the organization's Cascades and offers Ouvrir le tableau de bord Stripe (Open the Stripe dashboard).
- Changes in the account's situation are picked up automatically in Cascade, without any email being sent.
- To collect by direct debit, you also need a default payment method and a direct debit lead time. See Choose the default payment method and the direct debit lead time.
Good to know
- Only one Stripe account is linked to the organization, however many Cascades it has.
- Cascade does not use all the options Stripe offers during registration (fraud protection, climate, taxes).
- If you leave Stripe before the end, you can pick up where you left off from the Compte Stripe (Stripe account) block.
Frequently asked questions
Go back to My Cascade, Compte Stripe (Stripe account) block, and click Reprendre l'inscription (Resume registration).
In the Compte Stripe (Stripe account) block, click Ouvrir le tableau de bord Stripe (Open the Stripe dashboard).